Admin Guide
This guide covers everything you need to know to set up and run an election using Electobox. Whether you are running a small committee vote or a large multi-session organizational election, the setup process follows the same structure. This guide walks through each section of the admin panel in the order you'll typically work through them.
Before you start, it's worth understanding the overall shape of an Electobox election. Every event goes through a lifecycle: you configure it, open it for voting, close it, and then decrypt the results. Each of these phases has things you can and cannot do, so knowing where you are in the lifecycle at any given moment helps you understand what actions are available to you.
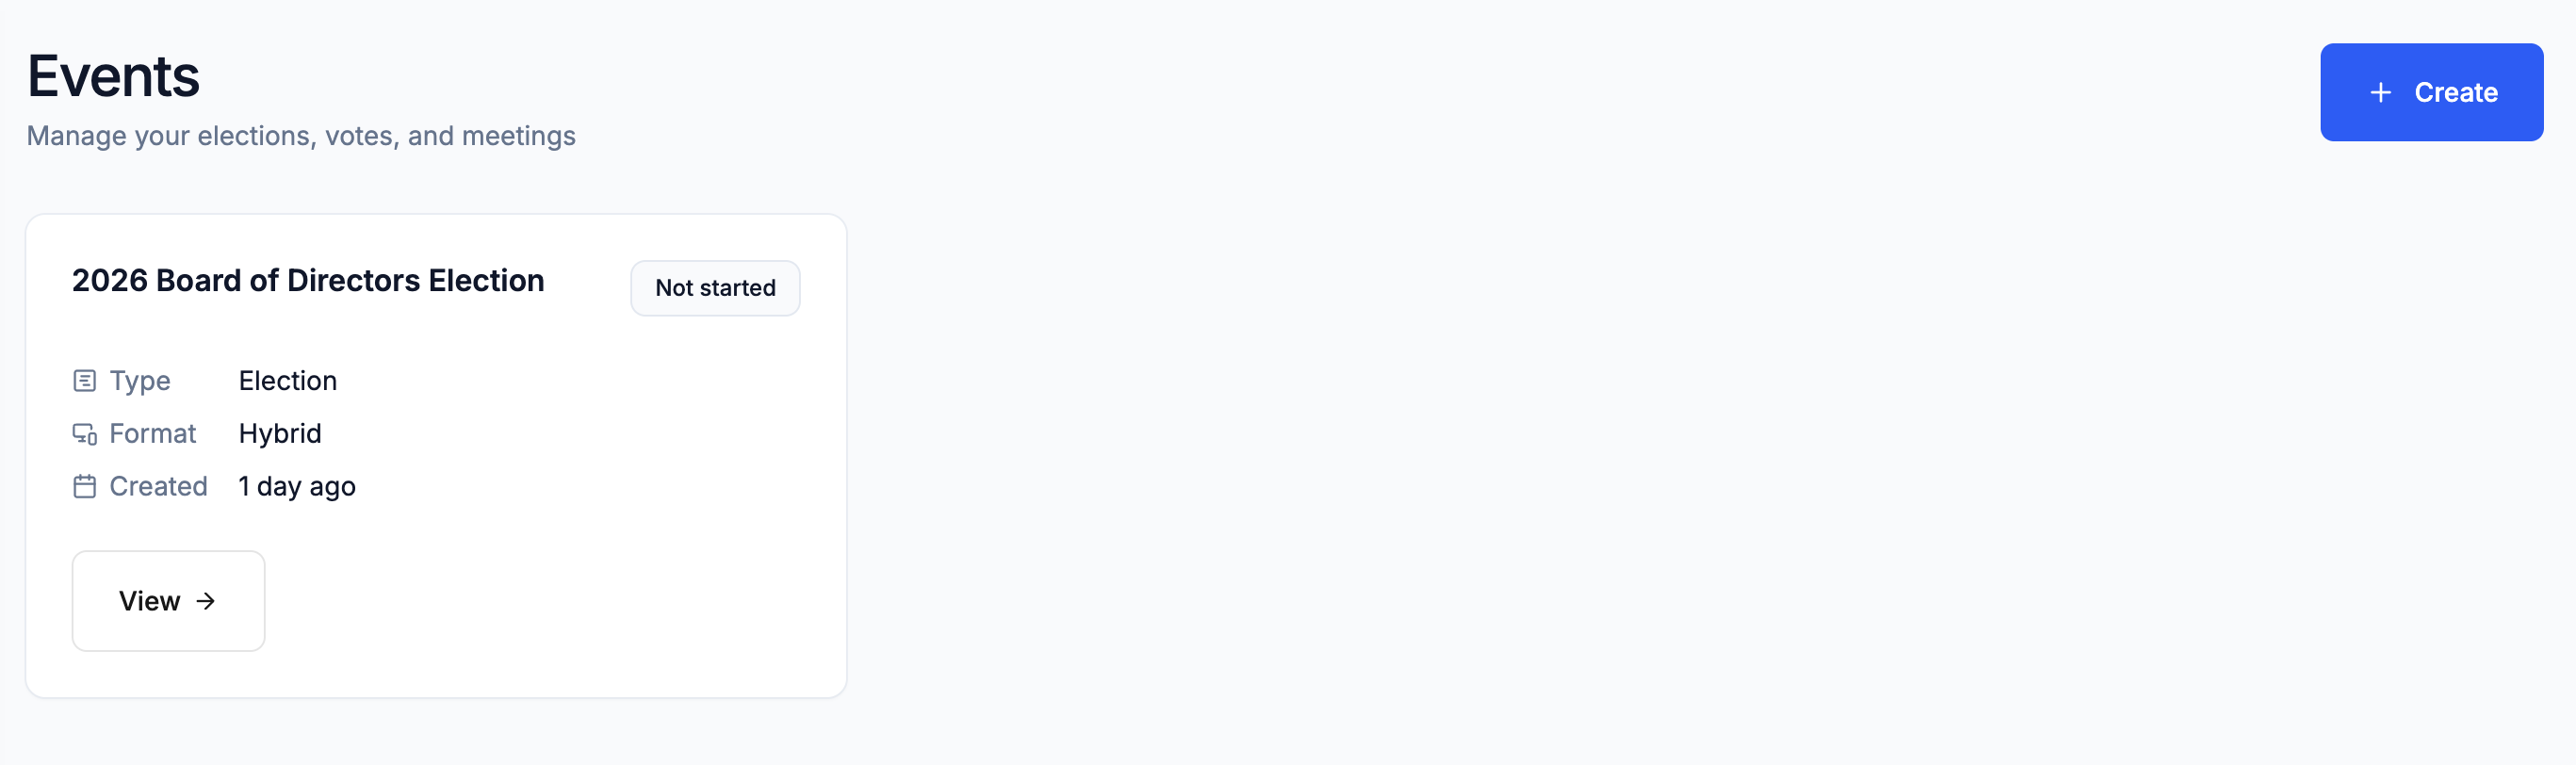
Events
The Events page is the starting point of the admin panel. Every time you log in, this is where you land. It lists all elections, votes, and meetings that have been created in your organization, giving you a complete overview of everything that exists — past, present, and in progress. Each event card shows the event name, type, format, creation date, and current status, so you can quickly see where things stand across all your events at once.
If your organization runs elections regularly, the Events page will accumulate over time into a useful historical record. You can open any past event to review its configuration and results, which can be helpful when setting up a similar event in the future.
Creating a new event
Click + Create to start a new event. A dialog will appear asking for two things: the event name and a short name.
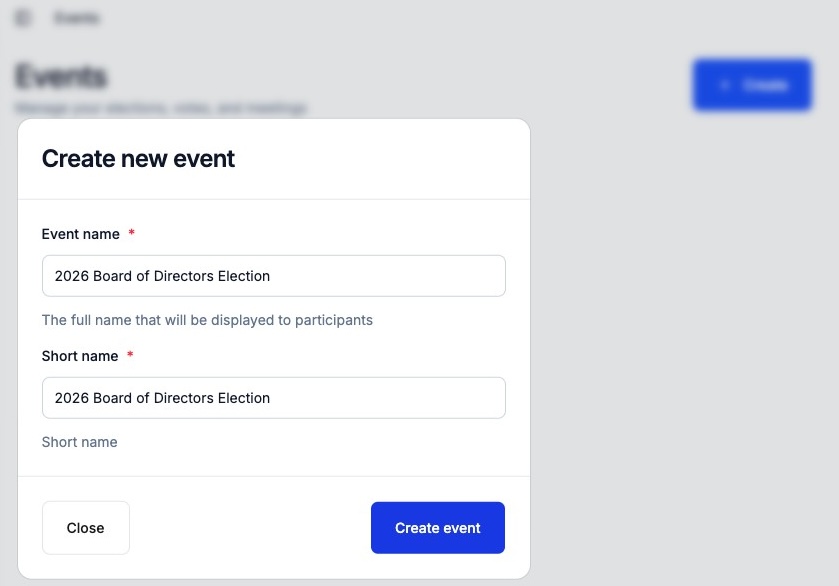
- Event name — The full name of the event, displayed to organizers and participants throughout the platform. Make it clear and descriptive: "Annual General Meeting 2025" or "Q3 Board Election" rather than something vague.
- Short name — A condensed version used in URLs and short messages where space is limited. It must have no spaces, so use hyphens or camelCase if needed. For example, "AGM2025" or "q3-board-election." This cannot contain special characters.
Once you click Create event, the event is created and you are taken directly to the event's Overview page to begin configuration. You can always return to the Events page by clicking the Electobox logo or using the breadcrumb navigation.
Opening an existing event
Click View → on any existing event card to open it. From there you can access all the configuration sections, monitor the election's progress, and view results once they are available.
Overview page
The Overview page is your control center for the event. It provides a clear summary of where things stand and links to all the sections you need to configure before the election can start.
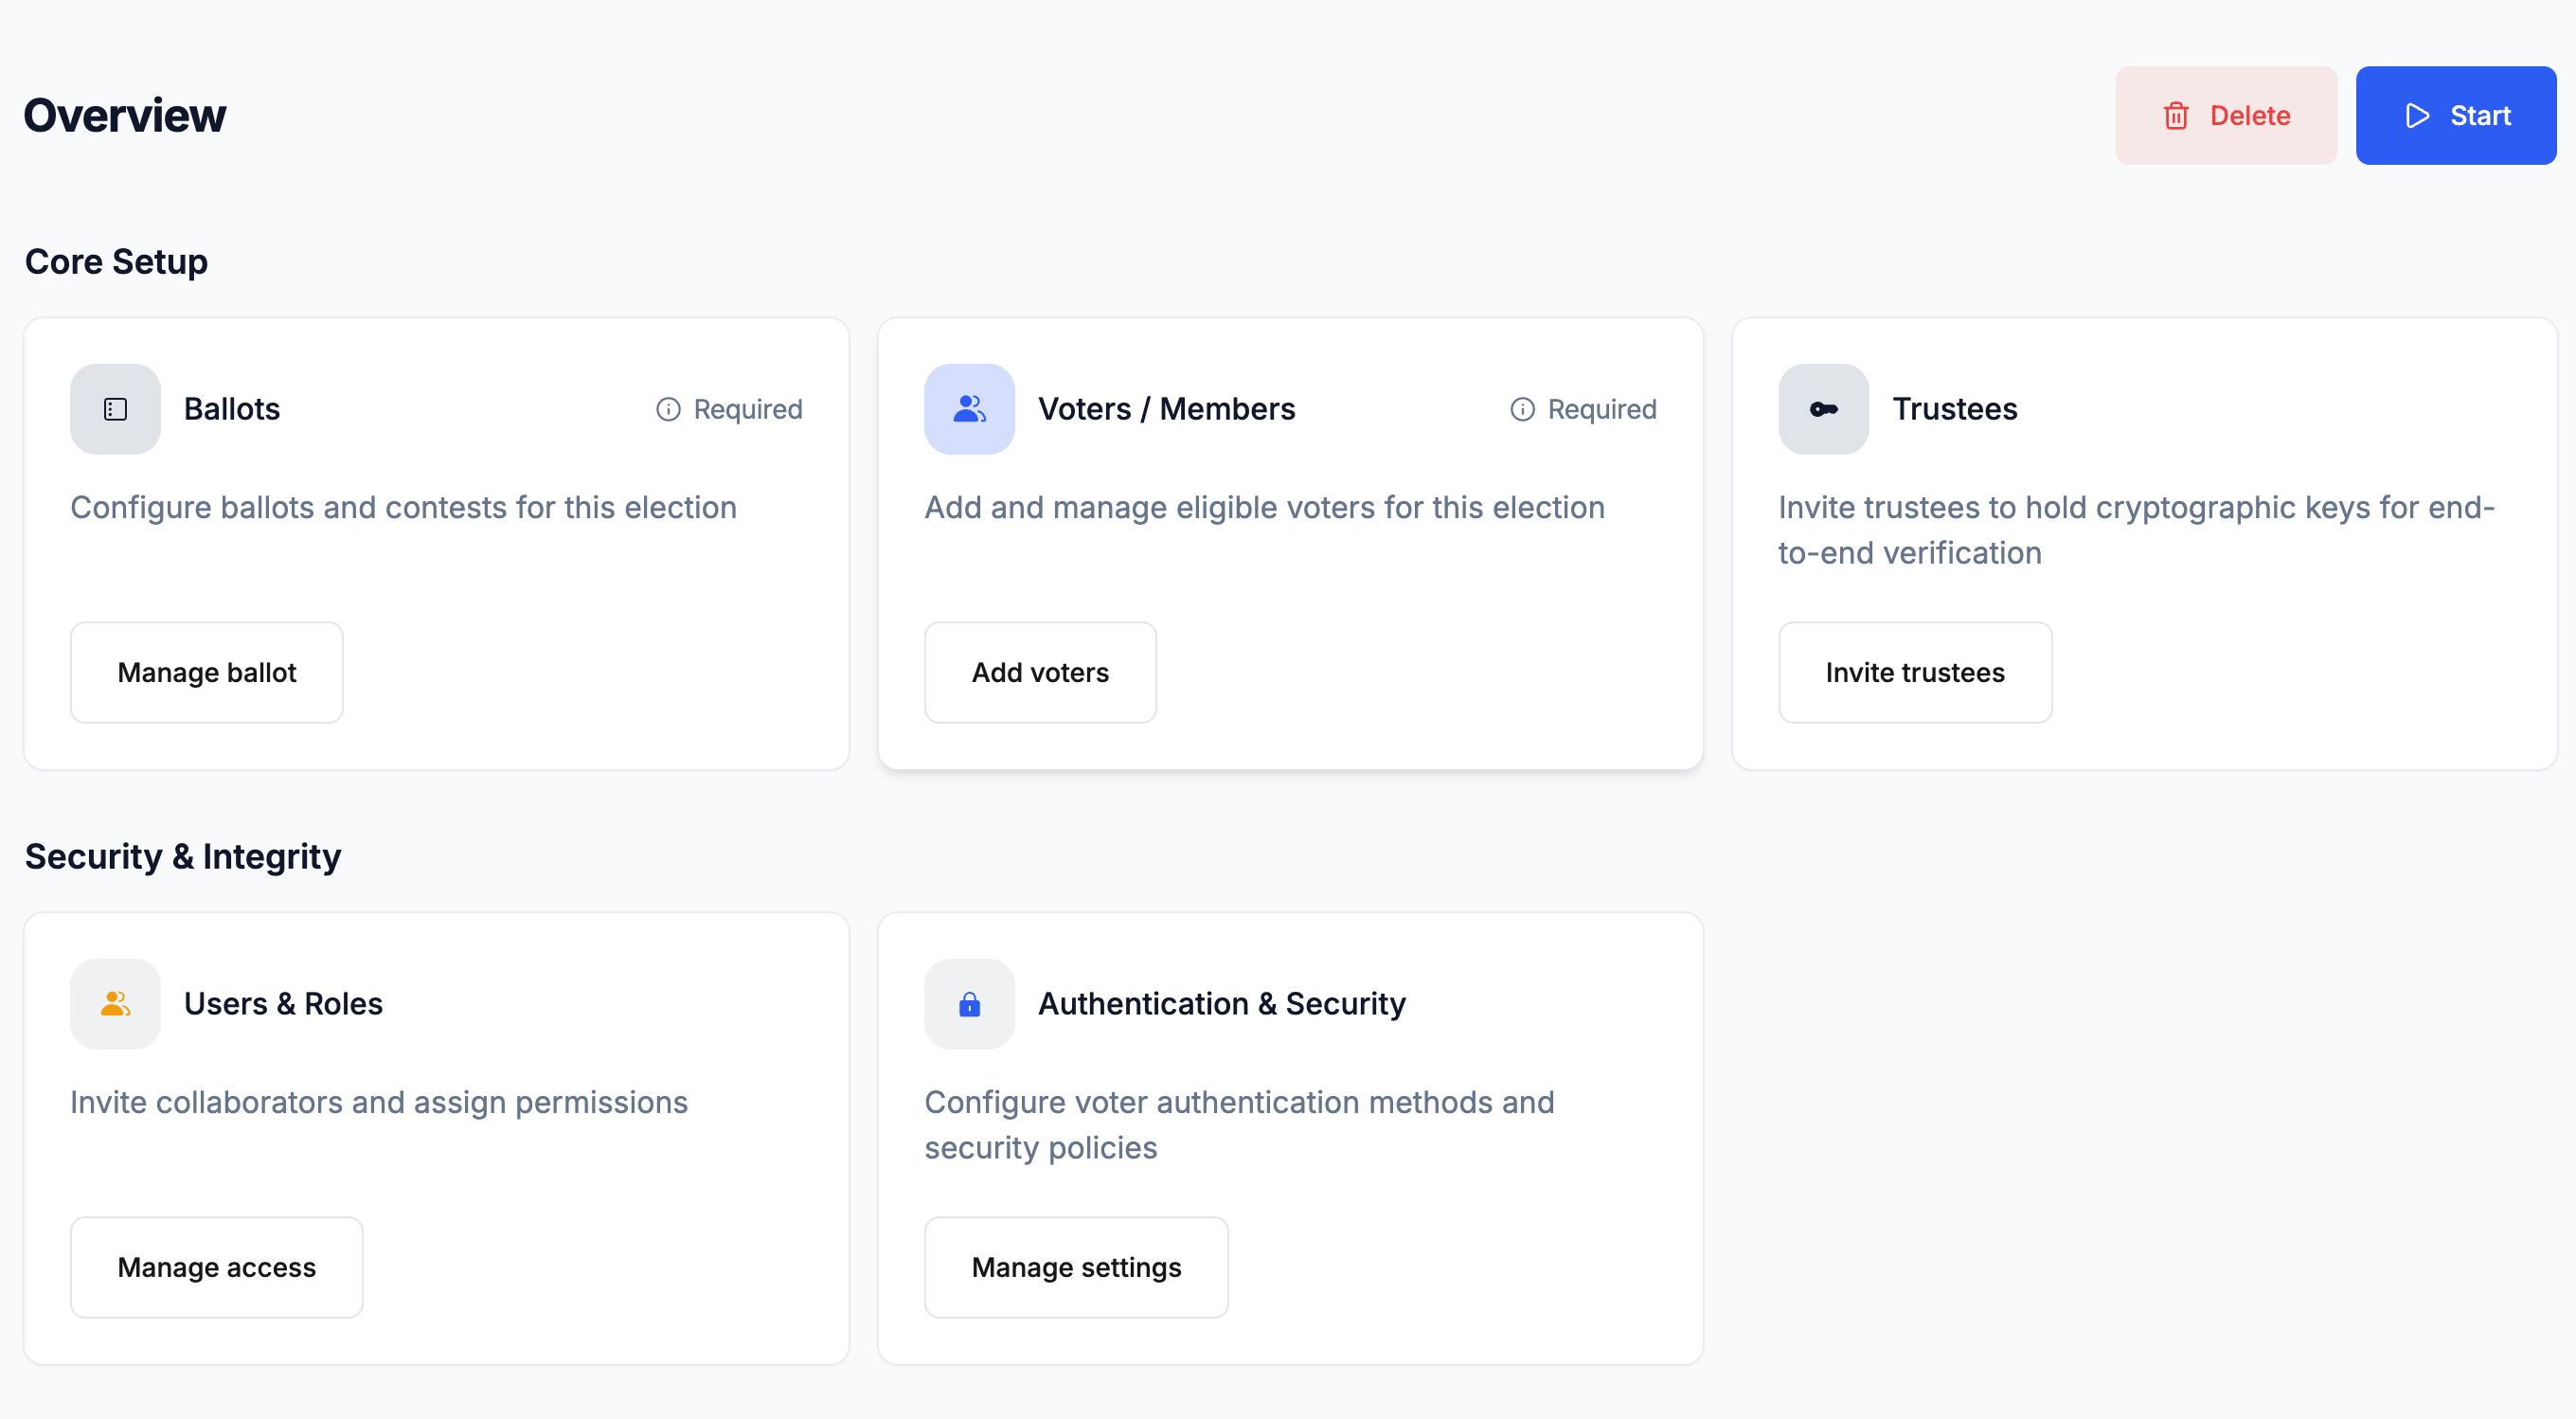
At the top of the page, you'll see the event name and a status badge that tells you exactly where the event is in its lifecycle. Understanding the status is important because different actions are available at different stages.
Event status
| Status | Meaning |
|---|---|
| Not started | Being configured; all settings editable |
| In progress | Voting is open |
| Paused | Voting suspended; can be resumed |
| Closed | Voting ended; decryption underway |
| Finished | Results available |
When an event is Not started, you have full flexibility every setting, ballot, and participant list can be modified freely. This is the phase where you should complete all your setup.
Once the event moves to In progress, ballots lock and most configuration options become unavailable. You can still manage participants in limited ways (correcting contact information, resending credentials, checking in in-person voters), but the substance of the election is fixed.
Paused is an intermediate state that allows voting to be temporarily suspended useful if a technical issue arises or a procedural decision needs to be made mid-election. Voting can be resumed from a paused state.
Closed means voting has ended. The event is now in the decryption phase, waiting for trustees to submit their partial decryption keys. Results are not yet available.
Finished means all trustees have completed decryption and results are fully available to view and export.
Setup sections
Below the status badge, the Overview page displays two groups of setup sections: Core Setup and Security & Integrity. These are not just navigation links they also act as a visual checklist, making it easy to see at a glance which sections have been configured and which still need attention.
Core Setup — These three sections must be completed before the election can start. The election cannot be opened until all three are configured:
- Ballots — Where you create voting sessions and define the contests and candidates that participants will vote on. This is where the substance of the election lives.
- Participants — The electoral register. This is the list of everyone who is eligible to vote. No one can vote unless they are registered here.
- Trustees — The cryptographic key holders. Trustees are responsible for securing and later decrypting the results. You need at least one trustee, and typically two or more for security.
Security & Integrity — These settings shape how the event runs and how voters authenticate themselves. They should be configured early, before you start adding participants, as some options affect how participant data is structured:
- Settings — Covers event information, voting format (online or hybrid), authentication methods for online voters, in-person voting configuration, and special voting settings like weighted votes.
The recommended order for setup is: Settings first, then Trustees, then Participants, then Ballots. This order matters because some settings (like weighted voting) cannot be changed once participants have been imported, and trustees need to complete their key generation steps before the election can start.